Unlock Android Phone

Search: Unlock Android Phones

Showing posts with label Root Android Phone. Show all posts

Wednesday, July 15, 2015

Top 12 Reasons to Root Your Android Phone

6:26 PM


To root or not to root? That's a question which may puzzle you a lot. Rooting your Android phone gives you the privilege to take full control of any aspect of your Android life. After rooting, you can speed up Android phone, improve battery life, and enjoy apps that require root access, and more. Here, I list out top 12 reasons why root Android phone. Read it and then poll on the reasons at the end of the article.


Reason 1. Remove Bloatware


Every Android phone has many unnecessary preinstalled bloatware. These bloatware drain your battery life and waste space in phone memory. Feel annoyed about the bloatware and want to remove them? Unfortunately, these bloatware are irremovable and you can do nothing unless you root your Android phone. Once rooting, you're able to remove them completely from your Android phone.


Reason 2. Speed Up Your Android Phone to Perform Faster


You can do a lot of things to boost your Android phone without rooting, like install MobileGo.apk file to clean up caches and junk file. However, when your Android phone is rooted, you have the power to do more to enhance performance. You can remove unwanted bloatware, hibernate apps which run in the background automatically. Besides, you enable to unlock some hardware specifications to let hardware perform better.


Reason 3. Enjoy Apps that Require Root Access


There're tons of cool apps in Google Play Store, but not all of them are available for your Android phone. That's because some apps are blocked by manufactures or carriers. The only way to use them is to root your Android phone.


Reasons 4. Make a Full Backup for Your Android Phone


Thanks to Android open nature, you have easy access to content saved on the SD card. That's why you can easily backup music, photos, videos, document files, and even contacts from SD card. However, it's far from enough. When you upgrade to a new Android phone or do factory reset, you must also want to backup app and app data for future using. In addition, some awesome backup apps, like Titanium, are restricted to the rooted Android phones.


Reasons 5. Install Latest Android Version


Every time the latest version of Android (like Android 5.0) comes out, it brings you new features, and improves user experience. However, the latest version is only available for limited flagship Android phones, like Google Nexus Series. Most of ordinary Android phones are just left behind, unless one day the manufacturer makes some changes and gives you the power to do it. It's hard to say when it'll come. Therefore, to be the first one to use the latest Android version with your ordinary phone, you can do nothing but root it.


Reason 6. Block Advertisements to Play Apps Seamlessly


Fed up with the advertisements occurring constantly in your favorite apps, and want to block them all? It's impossible to block advertisements in apps unless your Android phone is rooted. Once rooting, you can install some add-free apps, like AdFree, to block all advertisement to play your favorite apps seamlessly.


Reason 7. Improve Battery Life


As I mentioned above, manufacturers and carriers put many preinstall but unnecessary apps on your Android phone. These apps run in the background and drain battery. To save and improve battery life, using custom ROM is a great choice. To make it, rooting Android phone is the first step you should take.


Reason 8. Flash a Custom ROM


Once your Android phone is rooted, you're able to unlock bootloader to flash a custom ROM. Flashing a custom ROM brings a lot of benefits for you. It changes the way you use your Android phone. For example, with a custom ROM, you can install some ad-free apps to improve battery life, upgrade later versions of Android to your Android phone which doesn't have it yet.


Reason 9. Optimize System


On your rooted Android phone, you can do a lot of things to optimize system. Fonts' folder is located at /system/fonts. Once you get root access, you can download your favorite font from internet and change it here. Besides, in /system/framework save some files which can be changed to optimize system, like display percentage of battery, use transparent notification center, and more.


Reason 10. Install Apps on SD Card to Free Up Space


Normally, apps are installed in the phone memory of your Android phone. The space of phone memory is limited. If your installed apps run out of your phone memory, your phone becomes slow. To avoid it, rooting is a great way for you. By rooting your Android phone, you'e able to install apps on SD card to free up phone memory space.


Reason 11. Use Gaming Controller to Play Games on Android Phone


Is possible to play game apps on your Android phone by using a gaming controller? Yes, of course. You can easily connect your gaming controller to your rooted Android phone for gaming playing wirelessly with Bluetooth. Read more about how to make it.


Reason 12. Truly on Your Own Android Phone


The last reason to root Android I want to say is that with root access, you're the only owner of your Android phone. Because Carriers and manufacturers always to try to control your Android phone by installing preinstalled apps. However, by attaining root access, you can block away the connection between your Android phone and carriers and manufacturers, and truly own your Android phone.

ncncn
Read More ...

Best 5 Android Root Tools to Get Root Access with or without Computer

5:30 PM


In this part, I recommend best 5 root software for Android, which enables to root your phone or tablet from computer easily and conveniently.

1. Wondershare MobileGo
Wondershare MobileGo is one of the best root software for Android you have ever seen. It’s an easy-to-use solution for rooting your Android phone or tablet in 1 click. Besides, it’s compatible with massive Android phones and tablets produced by Samsung, HTC, Sony, Motorola, LG, HuaWei, Acer, Google and more.

Pros
Fully compatible with Android 2.1 and up.
100% safe and secured, no risk.
DOES NOT void warranty.
Support over 3, 000 Android phones and tablets.
Backup/restore import data before/after rooting.
Manage rooted Android phone or tablet in one place.
Free.

Cons
Not offer unroot function for the time being.


DownloadWindows Version


3 people have downloaded it


2. Kingo
Kingo is another free software for Android rooting. Like Wondershare MobileGo, it also enables you to root your Android phone or tablet in 1 click. It supports Android 2.3 up to Android 4.2.2, and works well with HTC, Samsung, Sony, Motorola, Lenovo, LG, Acer, and so on.

Pros
Fully compatible with Android 2.3 up to Android 4.2.2.
Enable to remove root at any time.
Free of charge.
Safe and risk-free.

Cons
Not support Android 4.4 or up.


3. SRSRoot
SRSRoot is a little rooting software for Android. With it, you can root your Android phone or tablet, as well as remove root access with a single click. It’s free of charge and provides you with two ways to root. One is Root Device (All Methods) the other is Root Device (SmartRoot).

Pros
Work well with Android 1.5 up to Android 4.2.
Support unroot.

Cons
Not support Android 4.4 or up.


4. Root Genius
Like its name suggests, Root Genius is a smart Android root software created in China. It makes Android rooting simple, easy and fast.

Pros
Support more than 10,000 Android phones.
One click to root, simple an easy.
Enable to flash custom ROM, and remove built-in-apps after rooting.
Compatible with Android from 2.2 to 4.4.
Free

Cons
Not offer unroot function for the time being


5. iRoot
Just like Root Genius, iRoot is another powerful root software created by Chinese people. Just one click, and you can be the master of your Android phone or tablet.

Pros
Support thousands of Android phones.
High success rate of rooting.
Free of charge.

Cons
Not offer unroot function for the time being.


Part 2. Best 3 Root Apps for Android to Root Android without Computer
In this part, I recommend best 5 root software for Android, which enables to root your phone or tablet from computer easily and conveniently.

1. SuperSU Pro
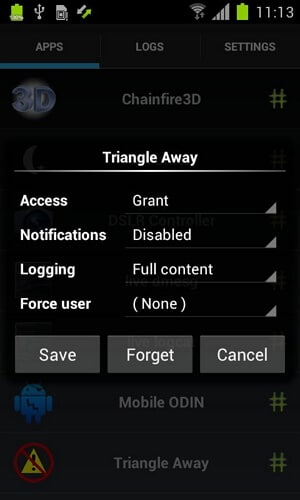
SuperSU Pro: SuperSU (Stands for super super user) is a root access app for Android, which can grant or deny access to root whenever any app requests root access. It will record your choice and allow those apps to access root without prompting. It also makes a log of root accesses.

Features
Root access prompting, logging, and notifications.
Temporarily unroot or completely unroot your phone or tablet.
Work even when Android is not properly booted.
Wake on prompt.
Work as system app.
Accesses it by dialing *#*#1234#*#* or *#*#7873778#*#* from the dialer even it is hidden from the launcher.
4- Selectable themes Dark, Light, Light- Dark Actionbar, and Default device.
5- Selectable icons for the app.

Advantages
Smooth app, no extra load on CPU.
No advertisement.
Can be hidden.
Small in size, just 2.2MB space.

Disadvantages
You cannot lock the app with a pin, but this feature is added in the Pro version which is a paid version of this app.

Download SuperSU Pro from Google Play Store>>


2. Superuser

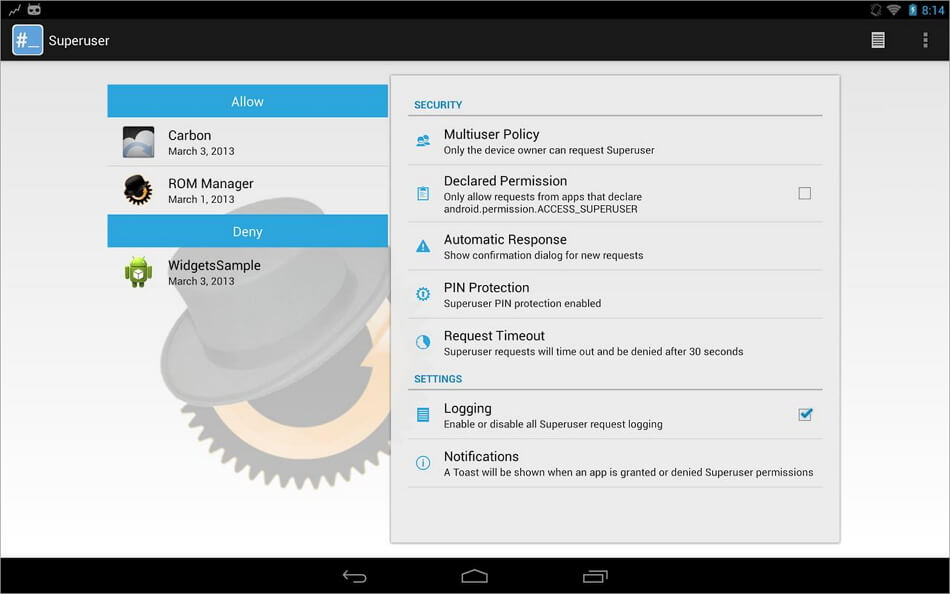
This app does almost the same as SuperSU. With this app you are going to get PIN protection for the fee, which is available after paying for it in the SuperSU.

This app is a little heavy compared to SuperSU, when it comes to CPU uses. The interface was not that good when the beta version was launched, but the official version is fine and runs smoothly. The developer of this app has announced that this app will always be free and no paid version will be launched ever.

Features
It provides multi user supports (android 4.2 onwards).
It is a totally open source project; you can find the source code at github.
PIN protection. It asks for PIN whenever it encounters a root access request.
Every app can be configured separately.
Root access prompting, logging, and notification features.

Advantages
It can handle multiple root access requests at a same time.
Updates very frequently in the marketplace, hence you will get added support to all the new Android versions almost instantly.
You can set the duration of request before they time out.
If you are looking for a free app, then you cannot find any app better than this one. You will never feel that you make a compromise by not going for a paid app.
No security voids in this app, everything is transparent.

Disadvantages
This app is a little bit heavy in terms of CPU uses
The interface could be made better, but this can be of personal preference. If I don't like the interface doesn't mean you will feel the same.

Download Superuser from Google Play Store>>


3. Superuser X [L]
It is an Android root app designed for experienced people or developers, newbies or amateurs are advised to stay away from this app. This app permits all the apps to access roots once the binary file gets installed, you can also remove this app after that. Hence, you won't get any pop ups asking for the permission to access the root, those pop ups might be irritating for you if you use plenty of rooted apps. Using this app you can stay away from that irritation.

Advantages
You will be getting the root access even if this app is uninstalled or gets corrupted once the binary file gets installed.
You can also uninstall the app after installing the binary file. Hence, you can save memory space.
Gives root access to every app without prompting for permission which can save your time, memory and CPU.

Disadvantages
The app is designed for developers and experienced user, if you feel secure by giving the root access by prompting for it, then the app is not for you.
If you are in a habit of downloading and installing random rooted apps from the web, then the app is not for you. You might brick your phone in that case.
Free version of this app shows some ads, to get rid of that, you should purchase the paid version.
This app is currently available for those Android devices which are running on the ARM processor.
The app is based on command line interface. Graphical user interface is not provided.

Download Superuser X [L] from Google Play Store>>
ncncn
Read More ...

Monday, July 13, 2015

Android ROM and rooting dictionary for beginners

4:52 PM


Diving into the world of rooting and modding your Android phone or tablet can feel like an overwhelming endeavor. Open a forum thread with some instructions and you’ll find yourself staring at all sorts of strange words and confusing combinations of letters. ROMs, Kernels, Nandroids, TAR images…what does it all mean?! We’re here to help! Below you’ll find the newb’s dictionary to the strange language of modding/hacking. This is not intended to be a technical definition of each concept, but an easy to understand explanation for the average Joe.


Get reading after the break:

advertising

Disclaimer: We chose NOT to put this “dictionary” in alphabetical order because we believe it follows a logical order from basic to more advanced hacking knowledge that will be easier for the complete beginner to follow and understand.

Root – Acquiring “root” is the process of gaining total control over your device. When you purchase your device, there are certain files and systems that you cannot access because they are blocked by the manufacturer. By aquiring root you gain access to these files, allowing you to modify, replace and even delete them. This allows you to take total control over how the software of your device looks and works.

Bootloader – Before you can root your device, you must unlock your bootloader. The bootloader is a line of code that is executed even before your Android operating system boots up. The bootloader’s code is specific for each make and model of the many Android devices. Bootloaders come “locked” because the device manufacturer doesn’t want you tinkering with the software that they worked so hard to optimize for that particular piece of hardware. Unlocking the bootloader allows you to tinker with the phone’s firmware, or even replace it with a custom firmware (aka: ROM). It is important to note that unlocking your bootloader will erase all data stored on your phone, essentially putting it back to a “factory reset” state, so you’ll want to save any pictures, music, or any other important files that are on your device.

Recovery – Once your bootloader is unlocked and you have rooted your device, you will need a custom recovery. A recovery is a piece of software that is called up separate from the actual Android operating system. Its purpose is to make changes to the Android OS at a core level, such as delete user data, apply updates and more. The stock recovery is limited in function, so if you are planning on modifying/hacking/rooting your phone, you will need to install a “Custom Recovery” such as Clockwork Mod Recovery. A custom recovery will allow you to make backups, restore them, wipe partitions, install custom software and more.

Backup / Nandroid – Once your custom recovery is installed, you will want to make a backup (also known as a Nandroid). A Nandroid is simply a complete and total backup of your phone. It will store all of your data, apps, settings, SMS messages, and more, basically allowing you to restore your phone to the exact state that it was in when you made the backup.

Wipe – Now that your backup is made, you don’t have to be afraid of making changes to your phone or losing data, since you can always restore it (just be sure to not delete the backup!). Now you can “wipe” your phone without worry. Wiping is deleting all the user data from your phone, essentially reseting it to its factory state. You can also wipe (ie: delete) other partitions of your phone like the cache partition. It is always recommended to wipe your phone before installing a custom ROM (we’ll get to that in a second). You can wipe your phone via the custom recovery you installed.

Flashing – Flashing is the process of installing some sort of software or code via your custom recovery.

Flashable ZIP – A flashable ZIP is the actual file that you install or “flash” via the custom recovery to make changes to your phone’s software. It is a normal .zip file that contains the lines of code to modify your software. These Flashable ZIPs can be used to flash a ROM, Kernel, Radio, mod, and more, which we will define below.

ROM – A ROM is the main firmware or operating system that your phone runs. Just like Windows 7 runs on your PC, or Mac OSX runs on your Macbook, a ROM is the main software you interact with to use your phone. It includes all the system apps (messaging, email, phone), the launcher, the notification bar…everything really. Google’s Nexus line runs a “stock” Android ROM (meaning it’s unmodified) while manufacturers make significant changes to the look and feel of their ROMS before they ship them with your phone (for example: note the difference between the Samsung Galaxy S III’s software and the software on LG’s Nexus 4) . Code-savvy developers have taken the manufacturers’ code and created their own “Custom ROMs”. These ROMs can dramitically enhance the look and feel of your phone, and often add tons of useful features. Two very popular custom ROMs are CyanogenMod and MIUI. A ROM is made for a specific model phone and comes in a Flashable ZIP file that is installed (“flashed”) via your custom recovery.

Kernel – Unlike a ROM the Kernel does not alter the look and feel of your phone, but is a “deeper” line of code that rests beneath the surface, so to speak. It tells the software how to interact with the hardware. A custom kernel is a kernel that developers have added code to, in order to create all sorts of new options and abilities. They might add code to make the phone’s processor run at a higher speed, or make the battery draw less power when the phone is in “idle” mode. Kernels are like the soul of the software. They can be flashed in the custom recovery and the files are usually called Tar Images or Zimages.

Radio / Basebands / Modems – The radio / baseband / modem is a firmware that allows your phone to connect to the wireless network. This firmware controls basic low-level functions of your phone like cell-network connectivity, Wi-Fi, and GPS. Oftentimes an updated radio / modem will help with signal strength issues, battery drain and more. The radio / modem firmware is specific to each device and carrier and is flashed via custom recovery.

Mod – A “mod” is simply a modification made to the phone’s software. This can include adding functionality or changing the visual layout of your phone, like moving the location of the clock to the center of the notification bar, or inverting the colors in the SMS app. Mods are usually Flashable Zip files that are flashed in the custom recovery.

Brick – A brick is when your phone won’t recover from a bad rooting/flashing process. Your device becomes unresponsive and unable to be restored…essentially making it a “brick” or a very expensive paperweight. Bricking your phone usually happens when you do not follow instructions carefully or if a device does not allow for root. Bricking your phone is a real possibility and risk in rooting and modding your phone, but it is very rare to occur, and most unlikely to occur if you simply follow the instructions.

Superuser (SU) – If you follow the instructions and root correctly, you will become a Superuser (SU), which means you become a complete and total admin of your device, allowing for most, if not all root permissions to be accessible.

Kang – A Kang is a ROM or mod that uses a significant portion of code created by another developer.

Overclock / Underclock – This means that you have installed a custom Kernel that has allowed you to speed up or slow down your phone’s processor speed. Most phones are clocked at a certain processor speed (ie: 2.4 MHz), but if you overclock it, you are allowing your process to push the limits by working at a higher speed. Overclocking will make your phone perform faster, but often comes at the expense of battery life. Underclocking does the exact opposite of overclocking. It makes your processor perform at a lower speed, slowing down perceived performance, but helps increase battery life.

Under Volt (UV) – Undervolting is a feature that is enabled in certain custom kernels. Undervolting lowers the amount of power your processor needs to perform at its normal level which, in theory, saves you battery life. The feature is known to cause issues in many phones.

APK – An APK is the file name for an Android application that can be installed on your phone. All apps downloaded from the Google Play store come as APK files. APKs can also be “sideloaded” by downloading them from outside of the Google Play store and placing on the phones internal or external memory. To install a sideloaded APK you need to enable that option in settings, then find the APK file on your phone and tap it to begin the installation process.

Odex / DeOdex – DeOdexing APKs is a way that developers optimize APKs (apps) to be compatible with different themes that themers have created. Please see this very good explanation on Odex / DeOdex that we wrote about previously.

Android SDK – Android SDK is a software development kit written by Google that enables developers to create applications for the Android platform. The Android SDK includes sample projects with source code, development tools, an emulator, and required libraries to build Android applications. In many cases, if you want to hack your phone, you will need to have the Android SDK installed on your computer.

ADB – ADB stands for Advance Debug Bridge which is a tool that comes in the Android SDK. ADB lets you modify your device (or device’s software) via a PC command line. ADB is mainly for developers to create and test their apps, but it can also be used by curious hackers (like you!) to access your phone from your computer and run some commands via your computer’s command prompt.


Well, that’s it for now! Hopefully this has demystified some of the strange language for you beginner hackers and interested parties. Now that you have a basic understanding of the words that you find in the forums, be sure to do some in-depth reading on how to properly root and mod your Android device. Remember, if your device breaks, it’s no one’s fault but your own. Check out XDA Developers to find many great resources for hacking your specific device. Happy hacking!

ncncn
Read More ...

Wednesday, July 8, 2015

How to Unlock Acer Liquid E600 if You Forgot PIN Password or Screen Lock

6:23 PM
How to Unlock Acer Liquid E600 if You Forgot PIN Password or Screen Lock
Some weeks ago, a friend of the University of Colorado_Boulder made me a phone and asked “How to unlock Acer Liquid E600 ?”. Many Acer Liquid E600 users wish to unlock their phones in order to use them with local SIM cards while traveling, or on domestic carriers that don’t offer an Android phone for sale.
Learn unlock your Acer Liquid E600:


If you wish to unlock your Acer Liquid E600 immediately, purchase an unlock code online. You’ll need your IMEI number, which you can find by going to Settings > About Phone > Status.
Turn off your Android device and remove the back cover and battery. Look for the SIM card, and remove the one that’s currently in your phone. Set it aside. Insert the new SIM card and replace the battery and back cover. Turn your phone back on.
When the phone boots up, it will display a screen asking for an unlock code for the new SIM. Enter the unlock code when prompted. Your Acer Liquid E600 is now unlocked.
If you cannot unlock or access the content of the Acer Liquid E600 then the best thing to do is a hard reset. A hard reset will perform the factory data reset on the device without having to navigate or access the phones settings. A hard reset also sets the phone back to its factory settings and the phone will be like it was when it was brand new.
But it’s really not. It comes equipped with a powerful dual core processor sporting GHz, an 8 megapixel rear facing camera packing 1080p video recording, a front facing camera in High Definition, mobile hotspot with Wi Fi built into the phone. Control your Android device with your voice using applications that integrate text to speech and speech to text recognition. While most hardware manufacturers bundle voice command apps with new devices, many of these apps fail to provide a completely hands free solution for text messaging. Hands free messaging can be a safer alternative to sending text messages while driving. If you’re looking for a speech recognition app for your Android device capable of managing your messages, then you may want to consider one of these free apps.
Should have been kept at I also hate how american carriers always have to stick there names all over a phone, looks really tacky.Other speculated changes include fixes for random data drops and an improvement in camera shutter speeds. They were the first to stop using harmful chemicals, they are the ones who know the true nature of common pests, such as slugs and aphids, and how to deal with them, and they are well aware of the time and energy it takes to maintain challenging landscape features, such as lawns and hedges and structures that don’t stand the test of time.Pop this cover off and you expose the nice and big 4020mAh battery.I used to edit Innovation Management.It costs MacMillan 8 for an assessment pack that enables a cancer Clinical Nurse Specialist to assess and care plan the needs of 100 people with cancer.
And it’s great for those times when you have little to no data service.Last years Tab 2 had no physical buttons on the front, as encouraged by Google, which supplies the Android software.Even more impressive for both Microsoft and Nokia is the fact that it accomplished the feat just two months after introducing the Lumia 800c to the Chinese market.Let’s look at both the applications in depth before comparing them.Together with the capacitive touchscreen there is a new way of controlling the game.
ncncn
Read More ...

Tuesday, July 7, 2015

How to flash a custom recovery (like CWM or TWRP) on Android

6:24 PM
If you have decided to take a trip to the land of custom ROMs and Android hacking in general, you’d need to take one first step - flash (install) a custom recovery. In this article, we explain what exactly is a ‘custom recovery’, how you install it, and what are some popular solutions.

Let’s start with the fact that every phone ships with stock recovery software. Stock recoveries vary slightly between phone makers, but they are identical in their essence - they allow you to manually flash official updates and clear your phone’s cache. Sounds limited? It is, and that’s why custom recoveries exist.

Custom recoveries that we’ll flash here replace the limited stock ones, adding all sorts of functionality to your phone. Flashing a custom recovery is often a key part of the rooting process, but that is not its only use. Here is a short summary of all that you can do with a custom recovery:


Create and restore a backup image - A backup image makes a copy of all your phone settings, application and app data. Such a backup copy is crucial if your hacking experiments fail - in such cases, you can use the created backup image to restore your phone to a fully functional earlier state without losing any data.

Flash custom ROMs - custom ROMs can completely overhaul the looks and functionality of an Android smartphone, and usually they are the main reason for first flashing a custom recovery.
Important: You have to unlock the bootloader on your phone before flashing a custom recovery! Here’show to do it on Motorola phones.


How to flash a custom recovery


Now that you know what a custom recovery is and what it does, it’s time to go through some popular names of recovery software. ClockworkMod (shortened to CWM) and Team Win’s Recovery Project (commonly referred to as TWRP) are the two most popular solutions, and while the two differ slightly, they both have the essential features you need.

Pre-requisites:


Your phone must be connected to your computer via USB. If you get stuck at some point in the tutorial, a common fix is to try disconnecting the phone and re-connecting it again.


How to flash a custom recovery (like CWM or TWRP) on Android


1. Enable USB debugging on your Android device. Connect your phone to a computer via USB.

view as one page »

Note: You can use this how-to tutorial guide to install custom recovery on phones like the Samsung Galaxy S5, Galaxy S4, Galaxy S III, Galaxy Note 3, Galaxy Note 2, HTC One (M8), LG G3, LG G2, Moto X, Moto G, Sony Xperia Z2, Xperia Z1, etc.
ncncn
Read More ...

How to unlock the bootloader on Motorola phones (Moto X, Moto G)

5:57 PM
Unlocking the bootloader is the first step in a journey to the land of custom ROMs, rooting, mods, and all other Android hackery, but for a newbie, it might also be a scary undertaking. In this article, we’ll explain in simple terms what’s a bootloader, and guide you through the surprisingly easy process of unlocking the bootloader of Motorola device like the Moto X and Moto G.

First, let’s clear up all confusion around the term ‘bootloader’. Bootloader has a very literal meaning - it’s the piece of code that’s executed before even the operating system loads. The function of the bootloader is basically to instruct the device how to load the OS. To do so, it has to communicate directly with the processor and motherboard (which are different for virtually every phone), so all in all, the bootloader is a very phone- and platform-specific piece of code. That is why it differs on, say, a Motorola and a Samsung phone. Some manufacturers decide to lock the bootloader on their phones as a way to ensure that no one can change their custom Android user interfaces. Luckily, Motorola has gone the more developer-friendly way, and the company itself provides a bootloader unlock, making the whole process extremely easy.

Why would you want to unlock the bootloader, though? Installing a custom ROM is one reason, but an unlocked bootloader is also often required for getting root access to the system.

If you have already made up your mind about unlocking the bootloader, we can get started with the unlocking process now. This guide applies for the Motorola Moto X and Moto G.

First, here are the pre-requisites for it all to work:

Warning: Unlocking your phone’s bootloader voids its warranty. It also completely wipes (formats) your Android phone’s internal memory including applications, contacts, images and so on.
1. Connect your phone to your computer via a USB cable. You have to enable USB debugging mode on your smartphone. To do so, simply navigate to Settings > About Phone > scroll to the bottom > tap Build number seven (7) times. You'll get a short pop-up in the lower area of your display saying that you're now a developer.


2. Go back and now access the Developer options menu, check ‘USB debugging’ and click OK on the prompt.


3. Now, it’s time to open Command Prompt (terminal) and get serious. Don’t worry, all you’d need to do is copy and paste some code in it, it's not hard at all. To open the terminal in Windows 7 hit the ‘Windows’ key, type ‘cmd’, and hit Enter; in Windows 8, you’d need to navigate to the new Modern UI home panel, and just type in ‘cmd’ there.

Once you open the terminal, you need to change the folder to Platform Tools in the Android SDK. Typically, it looks something like this, but you have to find the exact path where you installed the Android SDK on your computer:
C:/Android SDK/adt-bundle-windows-x86_64-20131030/sdk/platform-tools/

To change the folder you just copy the above path (as it is on your computer) and put ‘cd’ in front of it, so the whole command would look like so:
cd C:/Android SDK/adt-bundle-windows-x86_64-20131030/sdk/platform-tools/


4. Now, you are ready to start putting in the first commands that control your phone. In the command line type in the following:

adb devices

Hit ‘Enter’, and you should see the following:
List of devices attached
TA8900F923 device

The code will differ for different devices, so just make sure that something along these lines appears in the list of devices.

Next, type in:
adb reboot bootloader

This will make the phone reboot in bootloader mode. You’d need to wait a short while and see the bootloader menu.

Next, type the following in the terminal:
fastboot oem get_unlock_data

This will return you a unique string of code spread across five lines. It should look something like this:
(bootloader) 3A95720615784488#5441383833304C
(bootloader) 47325600585431303332000000#361D
(bootloader) 7293361E178D7D591294131B57789CA
(bootloader) 86EC4#C39412020F000000000000000
(bootloader) 0000000
OKAY [ 0.164s]
finished. total time: 0.164s


Congratulations, you have completed the first important part - this is your unique phone identifier. Now, you need to copy just the numbers appearing after ‘(bootloader)’, and that’s a bit tricky in the Windows Command Prompt. First, right click anywhere in the Terminal, select Mark, and mark the whole block of text. Then, hit enter. This will put all this copied text in the clipboard. Now, in an app like Notepad, simply paste the copied text and delete everything except for the numbers. Combine all numbers together so that they appear as a single string like so:

3A95720615784488#5441383833304C47325600585431303332000000#361D7293361E178D7D591294131B57789CA86EC4#C39412020F0000000000000000000000

5. Copy this super-long string and head straight to Motorola’s official website, sign and skip right to step 6.


Paste the already copied super-long string and click on the “Can my device be unlocked?” button. Make sure you have removed all blank spaces from the copied string, and you should get a green light to get your bootloader unlocked.

Accept the user agreements, and head to your email, where Motorola has sent you the final instructions.

6. FINAL INSTRUCTIONS: Copy the 20-character key that Motorola sent you via email. Then, in the terminal (make sure your phone is still connected to your computer via USB), type:

fastboot devices
To check that your phone is listed, and next:


fastboot oem unlock UNIQUE_KEY
Where instead of 'UNIQUE_KEY' you type in your own 20-character key that Motorola sent you via email.

7. Congrats! If you have entered all info correctly, your phone should be rebooting by itself, showing you the image you see on the right. And yes, now you have your bootloader unlocked!

It was a bit tedious, but not hard, was it? Let us know if this worked out for you and how the whole process went in the comments section below.


STORY TIMELINE
ncncn
Read More ...

Monday, July 6, 2015

The Complete Guide To Rooting Any Android Phone

7:58 PM

Also, if you want to double-check that SuperOneClick will work with your phone, a quick Google (e.g.superoneclick motorola milestone) will probably reveal whether it’s compatible.

What You’ll Need

  • A Windows PC: SuperOneClick has ports for Mac and Linux, but it’s pretty complicated to get it working. I haven’t used it myself, but you can check out its XDA Developers thread for more information. For the purposes of this guide, we’ll assume you have a working Windows PC to get this working. If you don’t have one, borrow one from a friend — after all, you’ll only need it once.
  • The USB Drivers for Your Phone: In order for your phone to fully communicate with your PC, you’ll need its USB drivers. To get them head to your phone’s manufacturer’s website and search for them on the Support page. Note: You can now grab an automatic driver installer at theSuperOneClick page on XDA and skip this step — though you can always download the drivers yourself if you so choose.
  • Previously mentioned SuperOneClick: This is the Windows program that will root your phone. It’s portable, so just download it and unzip it somewhere safe — no installation necessary.

The Process

First, find, download and install the USB drivers for your particular phone, if necessary. You can generally do a Google search for your device’s drivers, but you can just head to your manufacturer’s website too (e.g. HTC users will head to HTC’s website) and navigate to your device’s support page. Go ahead and install the drivers once they’re downloaded. Note: Again, you can now grab an automatic driver installer from SuperOneClick’s XDA page and skip this step if you so choose.
Next, make sure your phone is in USB Debugging mode. Head to Settings > Applications > Development, and check the USB Debugging box at the top.
Once you’ve done all that, start up SuperOneClick. Plug in your phone (make sure NOT to mount the SD card), and hit the “Root” button to root your phone — it’s that simple. When it finishes, you’ll see a message that says “Root files have been installed!” Hit Yes if it asks you to run a test, and if everything went according to plan, it should confirm that you have root permissions. You can now close out of the app.
To double check and make sure everything went well, when you open up your app drawer you should see an app called “Superuser”. If so, you’re good to go! You can now flash custom ROMs, run root-only apps and more. See the “What Now?” section below for more ideas.

Certain HTC Phones: The Unrevoked Method

If you’re running an HTC phone from 2010 and earlier, chances are you’ll need to use the Unrevoked tool. More specifically, Unrevoked roots the following phones:
If you have an HTC phone that isn’t supported by either method, Unrevoked may be working on support for it — they’re still actively developing the program and doing a great job. It usually takes them a few months, but once they get it up and running, it’s worth it. Unrevoked’s one-click method is a ton easier than the manual hacking you’ll have to do if you want root access right after a phone is released.

What You’ll Need

  • A Computer: Thankfully, Unrevoked is available for Windows, Mac and Linux. So as long as you have a PC handy, you can run it.
  • Previously mentioned Unrevoked3: When you head to Unrevoked’s website, you’ll see a list of phones. Click on yours, and you’ll probably be presented with two options — for a traditional root, you’ll want to make sure you download the “Unrevoked3″ tool, not “Unrevoked Forever”. It will automatically detect your operating system (Windows, Mac or Linux), so just hit the download link to grab the appropriate version.
  • HBOOT Drivers (Windows only): Windows users using Unrevoked will need to install a few drivers to get it working properly. Mac and Linux versions should be a plug-and-go affair.

The Process

If you’re running Windows, the first thing you’ll want to do is install the Unrevoked modified USB drivers (Mac and Linux users can skip the next two paragraphs). Download the drivers from this page, and extract them somewhere you’ll remember. Turn off your phone, then reboot into the HBOOT menu by holding the volume down button and then holding power. You should boot into a white screen. Plug your phone into your computer via USB, and wait for your phone to say HBOOT USB PLUG.
When it does, head to Start and search for Device Manager. Start it up and head to “Other Devices”, where you’ll see an “Android 1.0″ device. Right click on it and hit Update Driver Software. Click “Browse my computer for driver software” and navigate to the folder you extracted earlier. Hit next and let it install. If you get any warnings, just hit OK. When you’re done, and you should see the Device Manager now lists an Android Phone with “Android Bootloader Interface” under it.
Next, make sure your phone is in USB Debugging mode. Head to Settings > Applications > Development, and check the USB Debugging box at the top.
Now, start up the Unrevoked tool and plug in your phone (again, make sure to hit “charge only”). It should do everything for you automatically. Make sure you wait until Unrevoked says “Done” before unplugging your phone. If you open up your app drawer and see an app called “Superuser Permissions”, you’re done and can continue to flash custom ROMs, use root only apps and more (see the “What Now?” section for more inspiration).

Newer HTC Phones: The Revolutionary Method

From the makers of Unrevoked comes Revolutionary, a great new tool that unlocks the bootloader of many new HTC phones. This won’t actually root your phone, but after unlocking the bootloader, you can flash ClockworkMod Recovery and then flash a ROM of your choice, meaning you can flash a ROM that gives you root access. Currently, Revolutionary is in developer preview, but you can download it and try it on these supported phones:

What You’ll Need

  • A computer: You’ll need either a Windows or Linux computer to run Revolutionary.
  • Revolutionary: At the bottom of the page, you’ll see downloads for both Windows and Linux. After you click on one, you’ll be asked to name your phone, your HBOOT version, and enter your serial number, which will give you a beta key allowing you to use the program. You can find both your HBOOT version and serial number after you start up the program.
  • HTC Fastboot Drivers (Windows only): Windows users using Revolutionary will need to install a few drivers to get it working properly. Linux users won’t need these.

The Process

To unlock and root your phone with Revolutionary, first download the program as described above and extract the files to your desktop. If you’re on Windows, grab the HTC Fastboot drivers and install them as well. On your phone, head to Settings > Applications > Development, and make sure USB Debugging is turned on. Plug in your phone, and make sure it’s set to “Charge Only”.
Start up Revolutionary and make not of your HBOOT version. Head back to Revolutionary’s download page and pick your HBOOT version from the drop-down menu. The Revolutionary command prompt window should also list your serial number; copy that and paste it into the beta key box. Hit OK, copy your beta key, and then paste it into the command prompt. Revolutionary will root the phone, and reboot it a few times — just let it do its thing.
When it prompts you to download ClockworkMod Recovery, type Y and press Enter. If all goes well, it should flash ClockworkMod Recovery to your device, which allows you to root your phone and flash custom ROMs. Again, this will take a while; let your phone work. If it doesn’t work, you should be able to flash ClockworkMod by downloading ROM Manager from the Android Market and flashing it from the top option on the app’s home screen.
When all that’s done, you still need to gain root access to your phone. Download this ZIP file and put it on the root of your SD card (without extracting it). Shut down your phone, and boot it up into HBOOT. Usually this means holding the volume down button and then pressing the power button, though it may differ from phone to phone. Choose Recovery from the menu (using your volume rocker) and press the power button to enter ClockworkMod.
Once inside ClockworkMod, choose “Install ZIP from SD Card”, then pick “Choose ZIP from SD Card”. Choose the ZIP file you just added to your SD card, and let it do its thing. When you’re done, head back to the main menu and choose “Reboot System Now”. Once you’ve rebooted, check your app drawer for the Superuser app. If it’s there, you’ve achieved root, and you can get on to the really fun stuff (see the “What Now?” section at the bottom for ideas).

Newer Motorola Phones: The Pete Method

As you’ve undoubtedly heard, Motorola has gotten pretty controlling with its most recent phones, so SuperOneClick no longer works if you’ve updated Android to 2.3 Gingerbread. Luckily, in an attempt to root his Droid 3, developer Pete created a program that roots a number of Motorola phones, after which you can remove bloat and do whatever else you want to them (though certain phones may have a harder time flashing custom ROMs and kernels — you’ll need to search for specific methods related to your phone). Phones known to work with Pete’s Root Tool are:

Motorola Milestone 2

We haven’t tested this one ourselves, so we won’t go through the detailed process here. Hit the link below to download the program and see how it works.

Rooting the HTC Desire Z

The Desire Z is a special case. If you’re running 2.3 or above, you need to downgrade your phone back to 2.2 using this very involved method, then use a tool called Visionary to give it temporary root, and then go through a bit of manual hacking to make that root permanent. None of the Lifehacker editors have a Desire Z to test this on, but you can hit the link below to try it out for yourself. I’d also recommend heading over to The Unlockr for their video of the first step, using Visionary.

Rooting the Motorola Atrix

The Atrix now has an unlockable bootloader, meaning root is fairly easy to achieve. You’ll need to unlock your phone first (if you have Gingerbread already, skip to step 6), after which you can flash the ClockworkMod recovery and then flash a rooted version of the stock Gingerbread ROM. Alternatively, you can root it with some terminal commands, though it’s a bit more complicated and the Atrix guides at XDA Developers are pretty bad. Also check out how Elly did it on Gizmodo Australia. Hit the links below for a guide to each step in the process.

Rooting the Samsung Galaxy Nexus

Rooting the Galaxy Nexus is a simple matter of unlocking the bootloader and installing the proper superuser binaries. You have quite a few options, including a fairly simple flashing method that you can read about at the link below.

Rooting the Samsung Galaxy S II

Rooting the Galaxy S II is fairly easy, as long as you have a Windows PC handy. Like its predecessor, the Galaxy S, the Galaxy S II has many variants, meaning there’s no one rooting method that will work for everyone. Your rooting method will depend on which carrier you’re on, as well as what country you’re in. Non-US users with the i9100 version of the phone can check out this method. Be extra sure you’re following a guide for your specific device — most guides will have country codes that can help you find the right one.
For now, most of the guides require that you have the Samsung drivers for Windows and a program called Odin, which you’ll find in the guide for your phone. Odin will flash the ClockworkMod recovery to your phone, which you can use to push the Superuser app to your device, which gives you root access. You can then also flash ROMs and other things from ClockworkMod, if you so desire.
For more information, check out the All Things Root guides for the international Galaxy S II over at Android Forums.

What Now?

Now, the world is your oyster. Here are some things you can do:
  • Flashing a custom ROM like the popular CyanogenMod
  • Speeding up your phone if it’s feeling a little sluggish
  • Setting up an automated backup (and removing crapware) with Titanium Bakcup
  • Overclocking (or underclocking) your phone with SetCPU
  • Getting your tethering on with Wireless Tether or Wired Tether

Troubleshooting Problems

If you run into a problem rooting or flashing a ROM on your phone, we’ve written a guide to troubleshooting an almost-bricked Android phone. Be sure to check that out, as well as the instructions below on how to unroot your phone if worst comes to worst.

Unrooting Your Phone

If, in the end, you decide you want to go back to your over-the-air updates, stock ROM and unrooted goodness, you can unroot your phone. The process is a bit different for every manufacturer and every device, but these guidelines should get you on the right track.
This will return it to exactly how it was when you bought it from the store. You’ll lose all your apps, settings, ClockworkMod recovery and you’ll get over-the-air updates again.
For Motorola Phones: If you have a Motorola phone, you’ll need to use RSD Lite, the program that Motorola and its partnered carriers use to restore almost-bricked phones. RSD Lite isn’t exactly an official program open to the public, so you’ll have to Google around to find a version that works for you. You’ll also need an SBF file for your device, which is the original stock ROM that RSD Lite will flash to your phone. Google for this as well. RSD Lite only runs on Windows, so if you’re a Mac or Linux user, you’ll need a Windows partition or a friend with a Windows machine to help you out.
For HTC Phones: HTC phones can flash stock ROMs, known as RUUs, right from the phone’s bootloader. You’ll need to Google around for your device’s specific RUU file, but once you download it, save the ZIP file to your SD card and rename it (to something like PG05IMG.zip — the download page for the RUU file should specify which filename is required), booting up your phone should automatically flash the stock ROM from HBOOT, HTC’s bootloader. Check out the video at the left to see an example of this on the HTC Thunderbolt.
For Samsung Phones: If you’re using a Samsung Galaxy phone, you can use a tool called Odin to reflash an OPS file, which is a stock ROM that will return your phone to factory settings. You’ll need a Windows machine and a copy of Odin, which you can find by Googling around the net (as its not an official tool). Check out the video to the left to see an example of Odin, and check out The Unlockr’s guide to using Odinto familiarise yourself. You may need to Google around for your specific device’s OPS file and instructions.
This guide should have you up and running with root permissions on nearly every Android phone out there. I can’t test every Android phone in existence, so your mileage may vary. Let us know how you go in the comments below.
ncncn
Read More ...

Contact Form

Name

Email *

Message *